West Bend Coffee Maker Instructions: A Comprehensive Guide
Welcome! This guide provides detailed instructions for your West Bend coffee maker, ensuring a delightful brewing experience every time.
Learn to program auto-brew, maintain optimal performance, and troubleshoot common issues with this comprehensive resource, starting today, March 16, 2026.
Understanding Your West Bend Coffee Maker
Congratulations on choosing a West Bend coffee maker! These machines are designed for convenience and consistently brewing delicious coffee. Before diving into operation, it’s crucial to understand the core functionality. West Bend offers various models, often featuring large capacity brewing for families or offices.
The programmable features, like auto-brew, are central to the user experience, allowing you to wake up to freshly brewed coffee. Familiarizing yourself with the control panel and display is key. The manual, available on platforms like ManualsLib, provides detailed diagrams and explanations of each button and indicator.
Understanding how the machine operates – from water heating to coffee ground saturation – will help you optimize your brewing process. Proper use and maintenance, as outlined in the instruction manual, will ensure longevity and consistent performance. Remember to consult the manual specific to your model (like the CMWB12BK13) for precise details.
Model Identification & Variations
West Bend manufactures a range of drip coffee makers, each with slight variations in features and capacity. Identifying your specific model is the first step towards accessing the correct instructions and support. Common models include large capacity coffeemakers, often referenced in instruction manuals available for download on sites like ManualsLib.
The CMWB12BK13 is a frequently cited example, known for its programmable features. Variations may include differences in carafe material (glass or thermal), brewing strength options (like a ‘Bold Brew’ function), and the complexity of the control panel.
Refer to the label on the bottom or back of your coffee maker to find the exact model number. This number is crucial when searching for the corresponding user manual online. Understanding these distinctions ensures you’re following the correct procedures for your particular West Bend machine, maximizing its performance and lifespan.
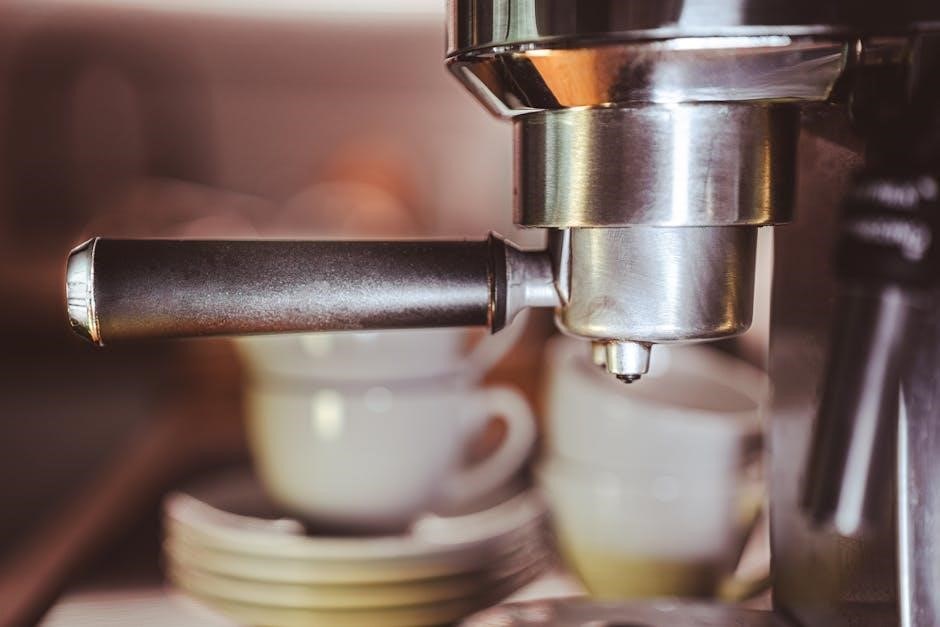
Key Components Overview
Your West Bend coffee maker consists of several key components working in harmony to deliver a perfect brew. These include the water reservoir, responsible for holding the water supply, and the filter basket, which securely houses the coffee filter and grounds. The carafe, typically glass or thermal, collects the brewed coffee.
The control panel features buttons for power, programming (auto-brew), and potentially, special functions like ‘Bold Brew’. A water level indicator displays the amount of water in the reservoir. Internal heating elements rapidly heat the water to the optimal brewing temperature.
Understanding the function of each part – from the spray head distributing water over the grounds to the warming plate keeping coffee hot – is essential for proper operation and maintenance. Familiarize yourself with these components for a seamless coffee-making experience.
Setting Up Your West Bend Coffee Maker
Prepare for brewing! Initial setup involves cleaning, filling the water reservoir, and inserting the appropriate filter into the filter basket for optimal results.
Initial Cleaning & Preparation
Before your first brew, a thorough cleaning process is essential to remove any manufacturing residue and ensure the purest coffee flavor. Begin by washing the carafe, lid, and filter basket with warm, soapy water. Rinse these components completely, ensuring no soap remains.
Next, wipe down the exterior of the coffee maker with a damp cloth. Do not immerse the coffee maker base in water or any other liquid, as this could cause electrical damage. To further prepare the machine, it’s recommended to run a full brewing cycle with just water. Fill the water reservoir to its maximum capacity, insert a paper filter, and initiate a brewing cycle without any coffee grounds.
Discard the water from the carafe after the cycle completes. This initial cleaning process effectively primes the system and guarantees a fresh start for your coffee-making journey. Repeat this water-only cycle one more time for optimal results.
Water Reservoir Filling Instructions
Proper water measurement is crucial for optimal coffee brewing. Locate the water reservoir, typically at the rear of your West Bend coffee maker. Open the reservoir lid and carefully pour in the desired amount of fresh, cold water. The reservoir features clear water level markings indicating cup quantities – refer to these markings to accurately measure the water.
Avoid overfilling the reservoir beyond the maximum fill line, as this could cause overflow during brewing. Similarly, ensure you add enough water to meet the minimum brewing requirement, usually indicated on the reservoir. Using filtered water is highly recommended for the best-tasting coffee and to minimize scale buildup within the machine.
Close the reservoir lid securely before initiating the brewing process. Double-check that the lid is properly sealed to prevent water from spilling during operation. Consistent and accurate water filling ensures consistently delicious coffee every time.
Filter Basket & Filter Types
The filter basket is a key component, holding the coffee filter and grounds during brewing. Locate the filter basket – it’s usually a swing-out or lift-out component. Ensure it’s clean before each use. West Bend coffee makers generally accommodate standard cone-shaped paper filters, size #4 being a common fit, but always verify your model’s specifications.
Reusable filters are also an option, offering an eco-friendly and cost-effective alternative. If using a reusable filter, ensure it’s specifically designed for drip coffee makers and is thoroughly cleaned after each use. Proper filter placement is vital; ensure the filter sits securely and flat within the basket to prevent grounds from overflowing.
Never operate the coffee maker without a filter in place, as this will result in coffee grounds entering the carafe. Using the correct filter type and ensuring proper placement are essential for a clean and flavorful brew.
Brewing Coffee with Your West Bend Coffee Maker
Enjoy fresh coffee! This section details the brewing process, from adding grounds to utilizing the convenient pause and serve feature for immediate enjoyment.
Adding Coffee Grounds – Recommended Amounts
Achieving the perfect brew starts with the right coffee-to-water ratio. For optimal flavor, West Bend recommends using approximately one to two tablespoons of ground coffee per six ounces of water.
However, personal preference plays a significant role! Experiment to find your ideal strength. A good starting point is two level tablespoons per standard coffee cup (approximately 6oz).
If you prefer a bolder taste, increase the amount of coffee grounds slightly. For a milder brew, reduce the quantity;
Important Note: The fineness of your coffee grind also impacts the flavor. A medium grind is generally recommended for drip coffee makers like the West Bend model. Using pre-ground coffee ensures consistency, or you can grind whole beans just before brewing for maximum freshness and aroma.
Always ensure the filter basket is securely in place before adding grounds to prevent any spillage during the brewing process.
Brewing a Standard Pot of Coffee
Let’s brew a delicious pot of coffee! After adding the desired amount of coffee grounds to the filter basket, ensure the carafe is properly positioned on the warming plate. Fill the water reservoir with fresh, cold water, using the water level indicator as a guide – typically, this corresponds to the number of cups you wish to brew.
Once everything is in place, simply press the power button to initiate the brewing cycle. The West Bend coffee maker will automatically heat the water and drip it through the grounds, extracting the rich flavors.
The brewing time will vary depending on the amount of coffee being made, but generally, a full pot will take between 8-12 minutes.
Enjoy! Once brewing is complete, carefully pour and savor your freshly brewed coffee. Remember to turn off the coffee maker when finished to conserve energy.
Using the Pause and Serve Feature
Need a cup before the brewing cycle is complete? The West Bend coffee maker’s Pause and Serve feature allows you to temporarily interrupt the brewing process and pour yourself a cup without making a mess. Simply remove the carafe from the warming plate during brewing – the brewing process will automatically pause.
Carefully pour the desired amount of coffee, then return the carafe to the warming plate within 30 seconds. This ensures the coffee maker resumes brewing smoothly and maintains optimal temperature.
Important Note: Leaving the carafe off the warming plate for longer than 30 seconds may affect the brewing process and potentially cause overflow.
This convenient feature provides flexibility and allows you to enjoy a quick cup of coffee whenever the craving strikes, without waiting for the entire pot to finish brewing.
Programming Your West Bend Coffee Maker
Wake up to fresh coffee! Easily program your West Bend coffee maker to begin brewing automatically at your desired time each morning for convenience.
Setting the Clock
Accurate time is crucial for utilizing the programmable features of your West Bend coffee maker. Begin by ensuring the unit is plugged into a functioning electrical outlet. Locate the “Clock” or “Time Set” button – its exact labeling may vary slightly depending on your specific model, but consult your user manual if needed.
Press and hold the “Clock” button until the hour display begins to flash. Use the “Hour” and “Minute” buttons to adjust the current hour. Once the correct hour is displayed, press the “Clock” button again to confirm. The minute display will now flash.
Similarly, use the “Hour” and “Minute” buttons to set the correct minute. Press the “Clock” button one final time to save the time setting. The display should now show the current, accurately set time, and stop flashing. A correctly set clock is the foundation for successful auto-brew programming!

Programming Auto-Brew Function – Step-by-Step
Wake up to fresh coffee! Programming the auto-brew function on your West Bend coffee maker is simple. First, ensure the clock is accurately set, as this is the basis for the auto-brew time. Locate the “Program” or “Auto” button and press it. The display will likely indicate “Program” or a similar message.
Next, use the “Hour” and “Minute” buttons to set the desired start time for brewing. Confirm the time by pressing the “Program” button again. Some models may require a final confirmation step, such as pressing the “Brew” button.
Finally, ensure the coffee maker has sufficient water and ground coffee in the appropriate compartments. The auto-brew indicator light will illuminate, confirming the function is activated. Your West Bend will now automatically begin brewing at the programmed time!
Adjusting Auto-Brew Start Time
Need a change in your morning routine? Adjusting the auto-brew start time on your West Bend coffee maker is straightforward. Begin by pressing the “Program” button. The currently programmed auto-brew time will be displayed. Use the “Hour” and “Minute” buttons to modify the time to your new desired start time.
Carefully review the displayed time to ensure accuracy, as even a small error can affect your morning brew. Once the correct time is shown, press the “Program” button again to confirm the adjustment. The display should revert to the current time, and the auto-brew indicator light will remain illuminated, signifying the updated schedule.
Remember to always double-check the settings after making changes to guarantee a perfectly timed, fresh pot of coffee awaits you each morning!
Cleaning and Maintenance
Regular upkeep is key! Consistent cleaning ensures optimal performance and extends the life of your West Bend coffee maker, preserving its brewing quality.
Daily Cleaning Procedures
Post-Brew Ritual: After each use, promptly discard used coffee grounds and the paper filter. Rinse the filter basket thoroughly with warm, soapy water, ensuring no residue remains.
Carafe Care: Wash the carafe with hot, soapy water immediately after emptying. Stubborn coffee stains can be tackled with a mixture of baking soda and water; let it sit before scrubbing gently. Avoid abrasive cleaners, as they can damage the glass.
Exterior Wipe-Down: Wipe down the exterior of the coffee maker with a damp cloth to remove any spills or splatters. Pay attention to the warming plate, ensuring it’s cool before cleaning;
Dishwasher Safe Parts: Check your model’s manual, but many West Bend coffee makers have dishwasher-safe carafes and filter baskets for convenient cleaning. Always confirm before placing them in the dishwasher.
Descaling Your Coffee Maker – Importance & Methods
Combatting Mineral Buildup: Over time, mineral deposits from water can accumulate inside your West Bend coffee maker, impacting brewing performance and coffee flavor. Descaling removes these deposits, restoring optimal functionality.
Descaling Solution Options: You can use a commercially available descaling solution or a homemade mixture of equal parts white vinegar and water. Follow the solution’s instructions carefully.
The Descaling Process: Fill the water reservoir with the descaling solution. Run a full brewing cycle without coffee grounds. Repeat with fresh water two to three times to rinse away any remaining solution or loosened mineral deposits.
Frequency: Descale your coffee maker every 1-3 months, depending on water hardness. More frequent descaling is recommended if you have hard water. Regular descaling extends the life of your appliance!
Cleaning the Carafe & Filter Basket
Maintaining Freshness: Regularly cleaning the carafe and filter basket is crucial for preventing stale coffee residue buildup and ensuring a consistently fresh brew; These components directly impact the taste of your coffee.
Carafe Cleaning: After each use, wash the carafe with warm, soapy water. For stubborn stains, create a paste of baking soda and water, gently scrub, and rinse thoroughly. Avoid abrasive cleaners that could scratch the glass.
Filter Basket Cleaning: Remove the filter basket and wash it with warm, soapy water after each brewing cycle. Ensure all coffee grounds are removed. The basket is often dishwasher safe (check your model’s manual).
Thorough Rinse: Always rinse both the carafe and filter basket completely to remove any soap residue before reuse. A clean coffee maker equals a better tasting cup of coffee!
Troubleshooting Common Issues
Facing problems? This section addresses typical West Bend coffee maker issues like power failures, slow brewing, and leaks, offering quick solutions for optimal performance.
Coffee Maker Not Turning On
Is your West Bend coffee maker failing to power on? Several factors could be at play. First, ensure the unit is securely plugged into a functioning electrical outlet. Test the outlet with another device to confirm it’s providing power.
Next, check the coffee maker’s power cord for any visible damage – frays, cuts, or exposed wires. If damage is present, do not use the coffee maker and consider a replacement cord or professional repair.
Some models feature a reset button, often located on the bottom or back of the unit. Attempt to reset the coffee maker by pressing this button. If the issue persists, consult the full instruction manual for model-specific troubleshooting steps. A blown fuse or tripped circuit breaker in your home’s electrical system could also be the culprit; check your breaker box accordingly.
Finally, ensure the carafe is properly positioned on the warming plate, as some models have a safety feature preventing operation without it.
Coffee Brewing Too Slowly
Is your West Bend coffee maker taking an excessively long time to brew a pot? This often indicates a buildup of mineral deposits, requiring descaling. Minerals from water accumulate over time, restricting water flow and slowing the brewing process.
Before descaling, verify you’re using the correct coffee-to-water ratio. Too much coffee can impede water flow. Also, ensure the filter isn’t clogged – try a fresh filter.
To descale, fill the water reservoir with a mixture of equal parts white vinegar and water. Run a full brewing cycle without coffee grounds. Follow with two cycles of fresh water to rinse away any residual vinegar taste. Regular descaling, ideally every 1-3 months depending on water hardness, will maintain optimal brewing speed and coffee quality. Consult your manual for specific descaling instructions for your model.
Coffee Maker Leaking
Discovering leaks from your West Bend coffee maker can be concerning! Several factors can contribute to this issue. First, check the water reservoir to ensure it’s properly seated and not cracked. A loose or damaged reservoir is a common cause of leaks.
Next, inspect the filter basket. An incorrectly inserted or overflowing filter basket can lead to drips. Ensure you’re using the correct filter type and haven’t overfilled it with coffee grounds. Also, examine the carafe for any cracks or chips, as a damaged carafe will certainly leak.
If the leaks persist, check the connections between the various components. Mineral buildup can sometimes compromise seals. Descaling (as described elsewhere in this guide) may resolve this. If the problem continues, contact West Bend customer support for assistance.

Safety Precautions
Always prioritize safety! Avoid electrical hazards, handle hot surfaces carefully, and prevent damage to your West Bend coffee maker for optimal, secure operation.
Electrical Safety Guidelines
Crucially, ensure your West Bend coffee maker is plugged into a grounded electrical outlet with the correct voltage. Never operate the appliance with a damaged cord or plug; immediate replacement is vital. Avoid using extension cords whenever possible, but if necessary, select one rated for the coffee maker’s wattage.
Do not immerse the coffee maker, cord, or plug in water or other liquids to prevent electric shock. Always unplug the appliance from the outlet when not in use, before cleaning, and if any malfunction occurs. Never attempt to repair the coffee maker yourself; qualified service personnel should handle repairs.
Keep the cord away from hot surfaces and sharp edges. Inspect the cord regularly for any signs of damage. Avoid pulling or yanking the cord when unplugging; grasp the plug instead. Following these guidelines will significantly reduce the risk of electrical hazards and ensure safe operation of your West Bend coffee maker.
Proper Handling of Hot Surfaces
Caution! Your West Bend coffee maker contains hot surfaces during and immediately after brewing. Always use oven mitts or pot holders when handling the carafe, warming plate, and any detachable parts that may be hot. Avoid touching these surfaces directly to prevent burns.
Be mindful that the carafe, even after brewing is complete, will retain heat for a considerable time. Exercise extreme care when pouring coffee to avoid spills and potential burns. Keep children and pets away from the coffee maker during operation and while it’s cooling down.
Never place the carafe on a hot stovetop or other heat source. Allow all parts to cool completely before cleaning. Remember that the warming plate remains hot for a period after the coffee maker is turned off. Prioritizing these safety measures will protect you and others from accidental burns.
Avoiding Damage to the Coffee Maker
Protect your West Bend coffee maker by following these simple guidelines. Never immerse the appliance base in water or any other liquid; this can cause electrical shock and damage internal components. Ensure the coffee maker is placed on a stable, level surface to prevent tipping and potential breakage.
Avoid using abrasive cleaners or scouring pads, as they can scratch the exterior and damage the finish. Do not operate the coffee maker with a damaged cord or plug. Always unplug the appliance before cleaning or when not in use. Regular descaling, as outlined in the maintenance section, prevents mineral buildup and prolongs the life of your coffee maker.
Use only genuine West Bend replacement parts. Do not attempt to disassemble or repair the coffee maker yourself; contact qualified service personnel for assistance. Proper care ensures years of reliable performance.

Advanced Features (If Applicable)
Explore enhanced brewing with features like Bold Brew for richer flavor, and the Keep Warm function for extended enjoyment of your coffee.
Bold Brew Function – How to Use
Enhance your coffee’s flavor profile with the Bold Brew function, designed to extract maximum taste from your coffee grounds. This feature is ideal for those who prefer a stronger, more robust cup of coffee. To activate Bold Brew, locate the designated button – often indicated with a “Bold” or similar icon – on your West Bend coffee maker’s control panel.
Before initiating the brewing process, ensure you’ve selected the Bold Brew option. The coffee maker will then adjust the brewing parameters, typically by slowing down the water flow and increasing the brewing time. This allows for greater extraction of oils and flavors from the coffee grounds.
Experiment with different coffee-to-water ratios when using Bold Brew to find your perfect strength. Keep in mind that using finely ground coffee may further intensify the flavor. Enjoy a bolder, more satisfying coffee experience with this convenient feature!
Keep Warm Function – Duration & Settings
Maintaining your coffee’s optimal temperature is effortless with the West Bend coffee maker’s Keep Warm function. After brewing completes, this feature automatically activates, preserving your coffee’s warmth for an extended period. Typically, the Keep Warm function will maintain a serving temperature for up to two hours, though this duration can vary depending on the specific model.
Some West Bend models offer adjustable Keep Warm settings, allowing you to customize the duration. Consult your user manual to determine if your coffee maker has this capability and how to adjust the settings accordingly.
Be aware that prolonged use of the Keep Warm function may slightly alter the coffee’s flavor over time. For the freshest taste, it’s recommended to consume the coffee within the specified Keep Warm duration. Enjoy consistently warm coffee with this convenient feature!
Water Level Indicator – Understanding the Display
The West Bend coffee maker features a clear water level indicator, crucial for brewing the perfect pot. This indicator, typically located on the water reservoir, displays the amount of water added, correlating directly to the number of cups of coffee you’ll brew. Markings are usually present for standard cup sizes, ranging from 4 to 12 cups, or even larger capacities depending on the model.
Ensure you fill the reservoir to the desired cup level, avoiding overfilling, which can cause leakage. Always check the indicator before starting the brewing process to guarantee accurate water measurement. Some models may utilize a digital display, providing a precise water level reading.
Understanding this indicator ensures consistent coffee strength and prevents potential issues. Refer to your specific model’s manual for detailed information regarding the water level indicator and its markings.