Stihl TS420 Manual: A Comprehensive Guide
Unlocking the potential of your Stihl TS420, this guide details features, applications, and solutions for optimal performance and longevity of your concrete saw.
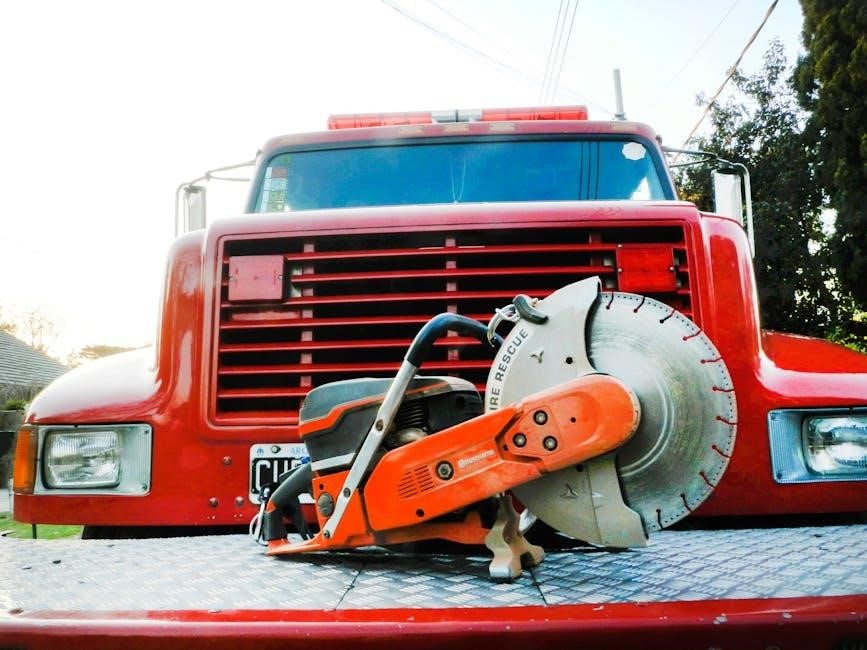
The Stihl TS420 concrete saw is a powerful, versatile tool designed for professional concrete cutting, landscape work, and construction projects. This manual serves as a comprehensive resource, guiding users through safe operation, maintenance, and troubleshooting. It details the saw’s capabilities, from precise cuts in concrete and masonry to asphalt and other hard materials. Understanding its features and adhering to the guidelines within will ensure efficient performance and a prolonged lifespan for your TS420.
Safety Precautions
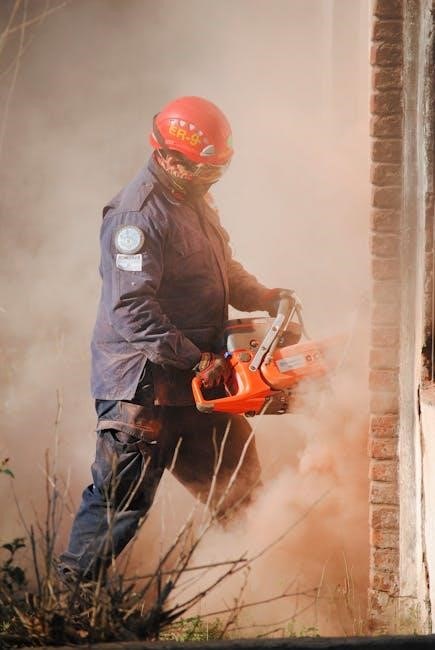
Prioritizing safety is paramount when operating the Stihl TS420. Always read and understand this manual before use. Be aware of potential hazards, including flying debris, noise levels, and the risk of kickback. Proper training and adherence to safety guidelines are crucial. Never operate the saw without appropriate personal protective equipment (PPE), and always inspect the tool before each use for any damage or malfunctions.
Personal Protective Equipment (PPE)
Essential PPE includes safety glasses or a face shield to protect against flying debris. Wear hearing protection, such as earmuffs, due to the saw’s high noise output. Sturdy work gloves enhance grip and protect hands. Appropriate work boots with ankle support are vital. Dust masks or respirators are recommended when cutting materials that generate airborne particles, safeguarding your respiratory system during operation.
General Safety Rules
Always inspect the TS420 before each use, checking for loose parts and damage. Ensure the work area is clear of obstructions and bystanders. Never operate the saw without proper training. Maintain a firm grip and stable stance during operation. Avoid cutting materials containing asbestos or other hazardous substances. Disconnect the spark plug before performing maintenance or repairs, prioritizing safety.
TS420 Components Overview
The Stihl TS420 boasts a robust design, featuring a powerful 65cc, 2-stroke engine. Key components include the magnesium engine housing, a dry diamond blade system, and adjustable cutting depth control. The anti-vibration system minimizes operator fatigue. Familiarize yourself with the fuel tank, oil tank, air filter, and spark plug locations for efficient maintenance and operation.

Engine Specifications
The TS420 is powered by a Stihl 2-MIX engine, delivering 6.5 kW (8.7 hp) of power. It has a displacement of 65.1 cm³ (4.0 cu. in.) and a fuel consumption of 0.85 l/kWh. The engine utilizes a digital ignition system for reliable starting and consistent performance. Its weight is approximately 9.5 kg (20.9 lbs), contributing to its portability and maneuverability.
Cutting System Details
The TS420 boasts a 12-inch cutting depth, making it ideal for various concrete cutting tasks; It accommodates blades with a 20 mm (0.79 in) arbor and features a water-delivery system to suppress dust during operation. The cutting speed reaches up to 3,800 rpm, ensuring efficient and precise cuts. Blade protection is integrated for enhanced safety.
Assembly Instructions
Prior to operation, proper assembly is crucial. Begin by carefully unpacking all components and verifying their presence against the parts list. Securely attach the handle assembly, ensuring a firm grip and comfortable operating position. Next, install the blade guard for optimal safety during cutting. Finally, if desired, attach the wheel kit for enhanced maneuverability.
Handle and Shield Attachment
Securely fasten the handle assembly to the saw body using the provided bolts, washers, and nuts. Tighten firmly, but avoid over-tightening. The shield should then be attached, aligning it with the mounting points and securing it with the appropriate hardware. Ensure the shield provides adequate protection during operation, and verify its stability before use.

Wheel Kit Installation
Begin by attaching the wheel brackets to the designated mounting points on the saw’s chassis, utilizing the supplied bolts and ensuring proper alignment. Next, firmly secure the wheels to the brackets, verifying they rotate freely. Double-check all connections for tightness before operation, guaranteeing stability and maneuverability. Proper installation enhances transport and positioning.
Operating Instructions
Before each use, inspect the TS420 for any damage or loose parts. Ensure a clear cutting path, free of obstructions. Always wear appropriate safety gear. Start the engine following the detailed starting procedure. Maintain a firm grip and controlled cutting speed. Regularly assess the cut for accuracy and depth, prioritizing safety at all times.
Starting the Engine
To initiate the TS420, engage the choke for cold starts, then prime the fuel bulb several times. Position the on/off switch to “on” and firmly grasp the starter handle. Pull the cord with a smooth, controlled motion until the engine ignites. Gradually disengage the choke as the engine warms. Always maintain a secure footing during starting.
Cutting Techniques
Employ steady, even pressure while guiding the TS420 along the cutting line. Avoid forcing the blade, allowing it to work at its own pace. For deeper cuts, utilize multiple passes instead of overwhelming the motor. Maintain a consistent speed and angle for clean, precise results. Always prioritize safety and control during operation.

Maintenance Schedule
Regular maintenance ensures peak performance and extends the life of your TS420. Inspect the air filter after each use, cleaning or replacing as needed. Check the spark plug every 25 hours of operation, replacing it annually. Fuel lines and filters should be inspected periodically for cracks or blockages. Adhering to this schedule guarantees reliability.
Air Filter Cleaning
Maintaining a clean air filter is crucial for optimal engine performance. Remove the filter cover and carefully tap out any loose debris. For thorough cleaning, wash the filter in warm, soapy water, rinsing completely. Allow it to dry fully before re-installation. Replace the filter if damaged or excessively dirty, ensuring proper airflow.
Spark Plug Replacement
Regular spark plug replacement ensures reliable starting and efficient combustion. Disconnect the spark plug wire and use a spark plug wrench to remove the old plug. Check the gap of the new plug against the specification in the manual. Install the new plug, tightening it to the recommended torque. Reconnect the wire securely.
Fuel and Oil Information
Maintaining proper fuel and oil levels is crucial for TS420 performance. Always use a high-quality, unleaded gasoline with a minimum octane rating of 87. Stihl recommends a specific fuel mix ratio – typically 50:1 for two-stroke engines – using Stihl HP Ultra oil. Incorrect mixtures can cause engine damage and void the warranty.
Recommended Fuel Mix Ratio
For optimal engine performance and longevity, a 50:1 fuel-to-oil ratio is generally recommended for the Stihl TS420. This translates to 50 parts gasoline to 1 part high-quality two-stroke engine oil, such as Stihl HP Ultra. Always pre-mix the fuel and oil thoroughly in a clean container before adding it to the TS420’s fuel tank.
Oil Type Specifications
Stihl recommends using a high-quality two-stroke engine oil specifically formulated for air-cooled engines, like the Stihl HP Ultra or equivalent. The oil must meet the ISO-LGD standard and possess excellent lubricating properties. Avoid oils containing vegetable oils or fats, as these can lead to deposit buildup and engine damage. Using the correct oil ensures reliable operation and extends the life of your TS420;
Troubleshooting Common Issues
Encountering problems with your TS420? This section addresses frequent concerns. Issues like a refusal to start often stem from fuel problems or a fouled spark plug. Cutting depth inconsistencies may indicate a worn blade or improper adjustment. Regularly inspecting and addressing these common issues will minimize downtime and maintain peak performance of your concrete saw.
Engine Won’t Start
If your TS420 fails to start, first check the fuel supply – ensure the tank isn’t empty and the fuel is fresh. A clogged air filter or a fouled spark plug are common culprits. Verify the spark plug wire is securely connected. Also, examine the choke and throttle settings for correct operation. Proper priming is crucial for a successful start.
Cutting Depth Problems
Insufficient cutting depth often stems from incorrect blade installation or a worn blade. Ensure the blade is securely mounted and of the correct type for the material. Check the wheel depth adjustment; it may need recalibration. A dull blade requires sharpening or replacement. Verify the guide roller is functioning correctly, providing stable cutting action.
Blade Selection and Installation
Choosing the right blade is crucial for efficient cutting. Diamond blades are categorized by segment bonding – soft, medium, and hard – matching material hardness. Installation requires a specialized wrench; ensure the blade is clean and undamaged. Always verify the arbor size matches the blade’s. Tighten securely, following the torque specifications to prevent slippage during operation and ensure safety.
Diamond Blade Types
Diamond blades vary based on bond hardness and application. Soft bonds excel in abrasive materials like brick, while medium bonds suit general concrete cutting. Hard bonds are ideal for dense, hard aggregates and asphalt. Segment shapes – continuous rim for smooth cuts, segmented for faster material removal – also influence performance. Selecting the correct blade maximizes efficiency and extends its lifespan.

Blade Changing Procedure
Always disconnect the spark plug wire before blade changes. Secure the saw and use appropriate gloves. Loosen the blade lock nut, then remove the nut and flange. Carefully remove the old blade, noting its orientation. Install the new blade, ensuring correct alignment, followed by the flange and lock nut. Tighten securely, then reconnect the spark plug.
Carburetor Adjustment
Proper carburetor adjustment ensures optimal engine performance. Identify the high and low-speed mixture screws. Warm up the engine fully before adjusting. Turn the idle speed screw for desired idling. Adjust the low-speed screw for smooth acceleration, then the high-speed screw for maximum power without surging. Fine-tune as needed for best results.
Identifying Carburetor Components
The carburetor features key parts for fuel-air mixing. Locate the idle speed screw, controlling engine idling. Identify the high and low-speed mixture screws, impacting performance. Note the fuel inlet fitting, connecting the fuel line. Recognize the choke lever, enabling cold starts. Understand the throttle linkage, managing engine speed – crucial for adjustments.
Adjusting the Mixture Screw
Fine-tune the fuel-air ratio with the mixture screw. Gently turn clockwise for a leaner mixture, improving throttle response. Counter-clockwise enriches the mix, aiding cold starts. Adjust in small increments, observing engine performance. Listen for smooth idling and optimal cutting power. Avoid excessive turning, preventing engine damage. Proper adjustment ensures efficiency and longevity.
Cooling System Maintenance
Maintaining optimal engine temperature is crucial. Regularly inspect and clean cooling fins, removing debris like sawdust and concrete dust. This ensures efficient heat dissipation. For models with water pumps, verify proper operation and coolant levels. A compromised cooling system leads to overheating and potential engine damage. Prioritize cleanliness and functionality for reliable performance.
Cleaning the Cooling Fins
Effective cooling relies on unobstructed airflow. Use compressed air or a soft brush to remove accumulated debris from the engine’s cooling fins. Avoid using water, as it can cause corrosion. Inspect fins for damage; bent or broken fins reduce cooling efficiency. Regular cleaning, after each use is ideal, prevents overheating and extends engine life.
Checking the Water Pump (if applicable)
For models equipped with water cooling, inspect the water pump regularly for leaks or unusual noises. Verify proper water flow during operation; reduced flow indicates a potential pump issue. Check the impeller for damage or blockage. A failing water pump can lead to rapid overheating and engine damage, requiring immediate attention and repair.
Storage and Transportation
Proper storage preserves your TS420’s longevity; For long-term storage, drain fuel, and run the engine until it stalls. Clean thoroughly and store in a dry, secure location. During transport, ensure the blade is guarded and the engine is off. Secure the saw to prevent shifting or damage, following all local regulations for safe transport.
Long-Term Storage Procedures
Preparing your TS420 for extended downtime is crucial. Completely drain the fuel tank to prevent gumming and carburetor issues. Run the engine briefly until it stops to clear the lines. Clean the saw thoroughly, removing debris. Store in a dry, dust-free environment, ideally covered, to protect against corrosion and damage.
Safe Transportation Guidelines
Prioritize safety when moving your TS420. Ensure the engine is completely cool before transport. Securely fasten the saw in a vehicle to prevent shifting or damage during travel. Always engage the transport lock, if equipped, to protect the blade. Consider a protective case for added security and to prevent accidental contact.
Technical Specifications
Understanding the TS420’s capabilities requires key data. This section details crucial dimensions and weight for handling. Performance data, including cutting depth and speed, is provided for optimal use. These specifications are vital for informed operation and maintenance, ensuring efficient concrete cutting and prolonged equipment life; Refer to these details frequently.
Dimensions and Weight
Precise measurements are crucial for maneuverability and transport. The Stihl TS420’s overall length, width, and height are detailed here, aiding in workspace assessment. Its dry weight, typically around 46.3 lbs, impacts handling and trailer load calculations. Knowing these figures ensures safe operation and efficient logistical planning for job site accessibility.
Performance Data
Understanding the TS420’s capabilities optimizes cutting efficiency. Engine power output is a key metric, influencing cutting speed and depth capacity. Maximum cutting depth, typically reaching 4.7 inches, dictates project suitability. Fuel consumption rates inform operational costs, while noise and vibration levels impact operator comfort and safety during prolonged use.
Parts Diagram and Ordering
Efficient maintenance relies on accurate parts identification. Detailed diagrams illustrate component locations, simplifying repairs and replacements. Utilize part numbers for precise ordering, avoiding compatibility issues. Authorized Stihl dealers offer genuine parts and expert assistance. Online portals provide convenient access to diagrams and ordering systems, ensuring quick turnaround times for essential components and continued operation.
Locating Parts in the Diagram
The exploded view diagram is your key to identification. Each component is clearly numbered and labeled, corresponding to the parts list. Begin by identifying the assembly you need, then locate the specific part within that assembly. Refer to the index for detailed descriptions and alternate views, ensuring accurate part selection for successful repairs and maintenance.
Ordering Replacement Parts

Genuine Stihl parts ensure optimal performance and longevity. When ordering, always have your TS420’s serial number and the part number from the diagram readily available. Contact your local authorized Stihl dealer or visit the Stihl online parts catalog. Double-check part numbers before finalizing your order to avoid delays and ensure compatibility with your saw.
Warranty Information
Stihl stands behind the quality of its products. The TS420 is covered by a limited warranty against defects in materials and workmanship. Warranty duration varies; consult your purchase receipt or the official Stihl warranty statement for specifics. Damage due to misuse, improper maintenance, or unauthorized repairs voids the warranty. Register your saw promptly to activate coverage.