Whirlpool Dryer Repair Manual PDF: A Comprehensive Guide
This manual provides detailed instructions for troubleshooting‚ diagnosing‚ and repairing Whirlpool dryers. It covers essential safety precautions‚ tools needed‚ and step-by-step disassembly. Learn how to identify common issues like no heat‚ poor airflow‚ and faulty sensors. Model number and serial number are crucial for accurate repairs. Follow the guide to ensure efficient and safe restoration of your appliance’s performance.
Welcome to the Whirlpool Dryer Repair Manual‚ your ultimate guide to maintaining‚ troubleshooting‚ and repairing your Whirlpool dryer. This comprehensive resource is designed to help you understand your appliance better‚ ensuring optimal performance and longevity. Whether you’re a DIY enthusiast or a professional technician‚ this manual provides clear‚ step-by-step instructions to address common issues and complex repairs alike.
The manual covers essential topics such as safety precautions‚ diagnostic techniques‚ and detailed repair procedures. It also includes information on proper disassembly and reassembly of your dryer‚ ensuring you can perform repairs safely and effectively. By following the guidelines outlined in this manual‚ you’ll be able to identify and resolve problems efficiently‚ saving time and money.
Before starting any repair‚ always refer to your dryer’s model number and serial number‚ as specific instructions may vary. This manual is a valuable tool for anyone looking to take control of their appliance’s maintenance and repairs. Use it to keep your Whirlpool dryer running smoothly for years to come.
Safety Precautions for Repairing Your Whirlpool Dryer
Before starting any repair on your Whirlpool dryer‚ it is crucial to follow safety precautions to avoid injuries and further damage. Always disconnect the power and gas supply (if applicable) before attempting any repairs. Ensure the dryer is completely cool to prevent burns from residual heat. Proper ventilation is essential‚ as dryers produce heat and fumes during operation.
Wear protective gear‚ such as gloves and safety glasses‚ to protect yourself from sharp edges or debris. Never bypass safety features like the lid lock or thermal sensors‚ as this can lead to dangerous malfunctions. Use the correct tools for the job to avoid damaging internal components or injuring yourself. If you are unsure about a procedure‚ consult the manual or consider hiring a professional technician.
Clear the area around the dryer to ensure good airflow and visibility. Keep flammable materials away from the repair site. By following these safety guidelines‚ you can ensure a safe and effective repair process for your Whirlpool dryer. Always refer to your dryer’s model number and serial number for specific instructions.
Troubleshooting Common Issues with Your Whirlpool Dryer
Identify common issues by checking for no heat‚ poor airflow‚ or a non-starting motor. Verify the lid lock is functioning and ensure proper venting to resolve most problems effectively.
Why Your Whirlpool Dryer Won’t Start: Possible Causes
If your Whirlpool dryer refuses to start‚ several factors could be at play. One common issue is a faulty lid lock‚ as modern dryers require the lid to be securely closed to operate. Additionally‚ power supply problems‚ such as a blown fuse or a tripped circuit breaker‚ can prevent the dryer from turning on. Another possibility is a failed start switch or broken belt‚ which disrupts the machine’s ability to initiate a cycle. In some cases‚ thermal overload due to overheating might also cause the dryer to stop functioning. It’s crucial to check the model number to ensure accurate diagnostics and refer to the repair manual for specific instructions tailored to your appliance.
Diagnosing No Heat Issues in Your Whirlpool Dryer
If your Whirlpool dryer is not producing heat‚ it could be due to a variety of issues; A faulty heating element or blown thermal fuse are common culprits. Additionally‚ a malfunctioning thermostat or igniter may prevent the dryer from generating heat. In gas models‚ a faulty flame sensor or gas valve issue could be the root cause. It’s essential to check the venting system‚ as clogged vents can restrict airflow and prevent proper heating. Always refer to your model-specific manual for precise diagnostic steps‚ as the location and testing of components may vary. Using a multimeter to test electrical continuity can help identify faulty parts. Remember to prioritize safety by disconnecting power before attempting any repairs. Addressing these issues promptly will restore your dryer’s heating function and ensure efficient drying performance. Proper diagnostics are key to avoiding further damage and ensuring optimal appliance operation.
Step-by-Step Disassembly of Your Whirlpool Dryer
Begin by unplugging your dryer for safety. Remove the top panel by taking out the screws from the back. Gently pry the top open to access internal components. Next‚ remove the front panel by disconnecting wires and taking out screws. Slide out the drum after removing the belt. Keep track of all parts and use a container to organize screws. Take pictures or notes for reassembly. Avoid touching electrical components without testing for voltage. Proceed patiently‚ ensuring each step is done carefully to maintain safety and ease of reassembly.
Accessing Internal Components Safely
Before accessing internal components‚ unplug the dryer from the power source to prevent electrical shocks. Wear protective gloves and safety goggles to avoid injuries. Use a screwdriver to remove screws from the back of the dryer that secure the top panel. Gently pry the top open‚ ensuring it is stable to avoid accidental closure. Disconnect any wires connected to the top panel before fully removing it. For front panel removal‚ take out the screws at the bottom and sides‚ then carefully pull the panel forward. Use pliers if necessary to release clips holding the panel in place. Once the panels are removed‚ locate the drum and belts. Avoid touching internal electrical components without testing for voltage using a multimeter. Keep track of all screws and parts in a container for easy reassembly. Take photos or notes to document the process for reference later. Always proceed with caution to ensure your safety and the integrity of the dryer’s components.
Removing the Top and Front Panels for Repair
Removing the top and front panels is essential for accessing internal components. Start by unplugging the dryer and ensuring it is cool. Use a Phillips screwdriver to remove the screws securing the top panel‚ typically located at the back. Gently lift the top panel and set it aside. For front panel removal‚ take out the screws at the bottom and sides. Use a flathead screwdriver to release the clips holding the panel in place. Carefully pull the front panel forward‚ ensuring the drum remains stable. If the panels are stuck‚ avoid forcing them‚ as this could damage the appliance. Once removed‚ label and organize all screws and parts to prevent loss. Keep the panels in a safe place to avoid accidental damage. This step provides clear access to the drum‚ belts‚ and internal electrical components for further inspection and repair. Always handle panels with care to maintain the dryer’s structural integrity.
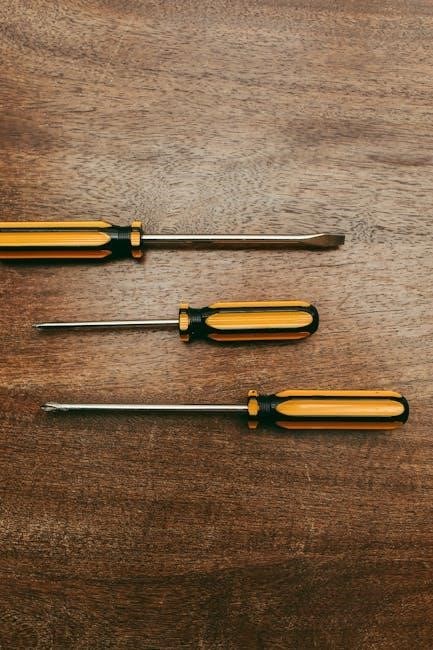
Diagnostic Tests and Tools You’ll Need
Essential tools include a multimeter for electrical testing‚ screwdrivers‚ and a venting test kit. Always use the correct model-specific diagnostic procedures and ensure proper safety measures. Model number and serial number are vital for accurate repairs and part identification.
Using a Multimeter to Test Electrical Components
A multimeter is essential for diagnosing electrical issues in your Whirlpool dryer. Start by ensuring the dryer is unplugged and cool. Use the multimeter to test continuity in switches‚ sensors‚ and wiring. Set the meter to continuity mode (diode or ohms) to check for open circuits or short circuits in components like the thermal fuse‚ heating element‚ or moisture sensor.
For voltage testing‚ set the multimeter to DC or AC voltage mode‚ depending on the circuit. Measure voltage at terminals of the power cord‚ timer‚ or control board to ensure proper power supply. If voltage is absent‚ trace the circuit to identify the fault. Use needle-nose pliers to safely disconnect wires for testing.
When testing resistance‚ use the ohms scale. Compare readings to expected values for components like the heating element (typically 10-30 ohms) or motor windings. An infinite reading indicates an open circuit‚ while a zero reading suggests a short. Always refer to your dryer’s wiring diagram for accurate testing points. If unsure‚ consult a professional to avoid further damage. This step-by-step approach ensures accurate diagnostics and safe repairs.

Reassembling and Testing Your Whirlpool Dryer
After completing repairs‚ carefully reassemble your Whirlpool dryer by reversing the disassembly steps. Ensure all screws‚ clips‚ and fasteners are securely tightened. Reconnect wires to their respective terminals‚ referencing the wiring diagram if necessary. Once reassembled‚ plug in the dryer and test its operation.
Start with a short test cycle to ensure the dryer heats properly and runs without unusual noises. Check for any signs of lint or debris near vents‚ as proper airflow is critical for efficient drying. Verify that the moisture sensor‚ if equipped‚ stops the cycle when clothes are dry to prevent overdrying.
If issues persist‚ revisit the troubleshooting steps or consult a professional. Regularly cleaning the lint filter and venting system will help maintain performance and safety. Proper reassembly and testing ensure your Whirlpool dryer operates efficiently and safely for years to come.