ClosetMaid wire shelving offers a versatile and durable solution for organizing closet spaces. This guide provides a comprehensive overview of the installation process, ensuring proper setup and functionality. By following these step-by-step instructions, you can achieve a professional-looking result, maximizing storage and ensuring long-term stability. Learn how to plan, prepare, and install your ClosetMaid wire shelving system with confidence.
Overview of ClosetMaid Wire Shelving System
The ClosetMaid Wire Shelving System is a popular choice for closet organization, known for its durability and versatility. It consists of wire shelves, wall clips, and support brackets, enabling customization to fit different closet layouts. The system offers adjustable shelves, allowing users to tailor storage to their needs. Its robust design ensures stability, while the sleek appearance enhances the overall look of the closet. This makes it an ideal solution for maximizing storage and creating a functional space.
Importance of Proper Installation
Proper installation is crucial for the ClosetMaid Wire Shelving System to ensure stability and safety. Improperly installed shelves may collapse, causing damage or injury. Following the manufacturer’s instructions guarantees optimal performance and longevity. Correctly securing wall clips and support brackets prevents wobbling and distributes weight evenly. A well-installed system maximizes storage potential while maintaining aesthetic appeal, making it essential to adhere to installation guidelines for a safe and functional closet organization solution.
Tools and Materials Needed for Installation
A level, screwdriver, hacksaw, and measuring tape are essential tools. Materials include screws, wall clips, support brackets, and shelf units. Gather all components before starting.
Essential Tools for ClosetMaid Wire Shelving
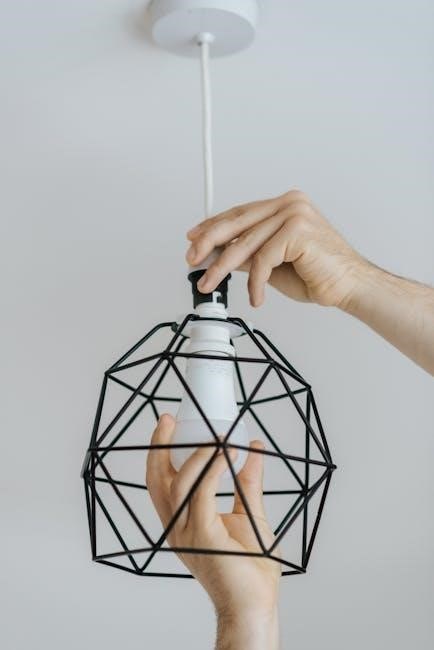
A level ensures shelves are straight, while a screwdriver secures components. A hacksaw or bolt cutter is needed for cutting wire shelving and rods. Measuring tape helps precise planning. Additional tools include a drill for pilot holes and pliers for tight spaces. Gathering these essentials beforehand streamlines the installation process and avoids delays. Proper tools ensure a safe and professional-looking result for your ClosetMaid wire shelving system.
Additional Materials Required
- Wall clips and support brackets for securing shelves to walls.
- Bolts, screws, and anchors for stable installation.
- Closet rods, hang tracks, and brackets for clothing organization.
- Protective gear like gloves and safety glasses for cutting.
- Optional decorative trim for a polished finish.
Ensure all components are included in your ClosetMaid kit or purchased separately for a seamless setup. Proper materials guarantee durability and functionality, making your shelving system both practical and visually appealing.
Preparation and Safety Guidelines
- Wear protective gear like gloves and safety glasses.
- Clear the closet space of clothes and furniture.
- Ensure all tools and materials are within reach.
- Measure accurately to avoid cutting errors;
Safety Precautions Before Starting Installation
Before installing ClosetMaid wire shelving, ensure the area is clear of obstructions and fragile items. Wear protective gloves and eyewear to prevent injuries. Avoid overreaching and use a sturdy ladder if necessary. Turn off electrical circuits if drilling near outlets. Keep sharp tools like bolt cutters or hacksaws away from children. Properly support shelves during installation to prevent collapse. Always follow manufacturer guidelines to ensure a safe and secure setup.
Clearing and Measuring the Closet Space
Begin by clearing the closet of all items to ensure unobstructed access. Measure the width, height, and depth of the space to determine optimal shelf placement. Record these dimensions to plan the layout effectively. Consider the location of electrical outlets, vents, and any obstructions. Use a level to ensure walls are straight and mark the spots for wall clips and support brackets. Accurate measurements are crucial for a secure and balanced installation, ensuring maximum storage efficiency and proper fit of ClosetMaid components.

Understanding ClosetMaid Shelving Components
ClosetMaid shelving systems include wire shelves, wall clips, support brackets, and hang rods. These components work together to create a sturdy and customizable storage solution. Key parts like shelves and brackets ensure stability, while hang rods add functionality for clothing. Understanding each piece is essential for proper installation and maximizing your closet’s potential;
Key Components of the ClosetMaid System
The ClosetMaid system features wire shelves, wall clips, support brackets, and hang rods. Wire shelves provide sturdy storage, while wall clips and brackets secure them to walls. Hang rods offer space for clothing, enhancing functionality. These components are designed for durability and customization, ensuring a reliable and adaptable shelving solution. Proper installation of these parts is crucial for stability and maximizing closet organization. Each component plays a vital role in creating a functional and long-lasting storage system for your space.
Role of Wall Clips and Support Brackets
Wall clips and support brackets are essential for securing ClosetMaid shelves to walls, ensuring stability and preventing collapse. Wall clips attach directly to the wall, while support brackets connect to the shelves, distributing weight evenly. Proper installation of these components is critical for safety and functionality, following manufacturer guidelines to guarantee optimal performance and durability of the shelving system in various configurations and loads.
Step-by-Step Installation Guide
Plan your layout, attach wall clips and brackets, then install shelving units. Ensure proper alignment and secure connections. Double-check all components for stability and safety before use.
Planning the Layout and Configuration
Start by measuring your closet space to determine the optimal placement of shelves and rods. Mark wall studs for secure installation. Consider storage needs, such as double hang sections for clothes or shelves for folded items. Plan the layout to maximize vertical space and accessibility. Use a level to ensure accurate markings. Pencil in the positions for wall clips, support brackets, and shelving units. Double-check measurements to avoid errors during installation.
Choose configurations like single or double rod setups, depending on your storage requirements. Ensure shelves are spaced appropriately for items like linens or shoes. Plan for optional features such as drawer units or shoe racks. Verify that all components align with your closet’s dimensions. A well-planned layout ensures functionality and ease of use. Proper configuration prevents stability issues and enhances the overall organization of your closet space.
Attaching Wall Clips and Support Brackets
Installing the Shelving Units
Position each shelving unit onto the installed wall clips and support brackets, ensuring a snug fit. Adjust the units as needed for proper alignment. Use a level tool to confirm even placement. Once aligned, secure the shelves by tightening the brackets firmly. Double-check stability before placing items. Proper installation ensures safety and maximizes the functionality of your ClosetMaid wire shelving system for years to come.
Assembling and Mounting Closet Rods
Begin by attaching the hang tracks to the shelving units or directly to the wall, ensuring they are level and securely fastened. Next, cut the closet rod to the desired length using a pipe cutter or hacksaw. Insert the rod into the hang track brackets, aligning it properly. Tighten the brackets firmly to hold the rod in place. Double-check the rod’s stability before hanging items. Properly assembled closet rods provide reliable support for your clothing and maximize closet space efficiently.
Final Adjustments and Checks
After installing all components, verify that the shelving system is level and securely attached to the wall. Ensure all brackets and clips are tightly fastened to maintain stability. Check the alignment of shelves and rods, making adjustments as needed for proper fit. Test the weight capacity by gently applying pressure to ensure the system is sturdy. Double-check that all parts are correctly assembled and no hardware is loose. Finally, confirm that the closet rods are properly seated in their tracks for smooth operation and optimal functionality.

Cutting and Customizing Shelving
ClosetMaid wire shelving can be easily cut to size using bolt cutters or a hacksaw. Closet rods can be trimmed with a pipe cutter or hacksaw for precise fit.
How to Cut Wire Shelving to Size
Cut ClosetMaid wire shelving using bolt cutters or a hacksaw for precise sizing. Measure the space accurately before cutting. Wear safety gloves and ensure the surface is stable. Place the shelving on a flat surface and cut slowly to avoid uneven edges. For cleaner cuts, use bolt cutters, as they provide a neat finish. After cutting, file any sharp edges for safety. Properly sized shelving ensures a secure and tailored fit for your closet space.
Trimming Closet Rods and Hang Tracks
Trim closet rods using a pipe cutter or hacksaw for precise length. For hang tracks, use a hacksaw or utility knife. Measure carefully to ensure a perfect fit. Cut slowly and evenly to maintain structural integrity. After trimming, file edges to remove sharp burrs. Properly fitted rods and tracks ensure smooth operation and a polished finish. Always follow safety guidelines when cutting to avoid injuries and maintain product durability.
Tips for Organizing Your Closet Space
Maximize closet space with ClosetMaid shelves. Place less used items on higher shelves and everyday essentials below. Use rods for hanging clothes, ensuring proper spacing for a clutter-free area.
Maximizing Storage with ClosetMaid Shelving
ClosetMaid wire shelving systems are designed to optimize closet space efficiently. By installing shelves at varying heights, you can store items like sweaters, linens, and accessories neatly. Double hang rods allow for maximum use of vertical space, accommodating more clothes without overcrowding. Additionally, using shelf dividers or bins can keep items organized and easily accessible, ensuring your closet remains clutter-free and functional for years to come.
Optimizing Shelf Placement for Different Items
Strategically placing shelves enhances closet functionality. Position higher shelves for less frequently used items, like out-of-season clothes or storage bins, while lower shelves can hold everyday essentials. Double hang rods maximize vertical space for clothing, and shelves can be adjusted to accommodate different heights. This tailored approach ensures efficient use of space, making it easy to access and organize your belongings effectively. Proper placement also prevents overcrowding, maintaining a tidy and accessible closet environment.
Troubleshooting Common Installation Issues
Common issues include misaligned brackets, uneven shelves, or loose connections. Ensure all components are securely fastened and level. Refer to the installation manual for solutions.
Resolving Alignment and Stability Problems
Alignment issues often arise from improper bracket installation. Use a level tool to ensure shelves are straight and secure. If shelves feel unstable, check for loose wall clips or support brackets. Tighten all hardware firmly and verify weight distribution is even. For misaligned shelves, adjust the position of wall clips or support brackets slightly. Ensure all components are properly locked into place to maintain stability and prevent wobbling. Regular checks and adjustments will help maintain the system’s integrity over time.
Fixing Common Mistakes During Installation
Common installation mistakes include misaligned brackets, loose hardware, or incorrect wall clip spacing. To fix, ensure shelves are level, tighten all connections, and adjust bracket positions as needed. If shelves are uneven, reposition wall clips or support brackets. For improperly cut components, use a bolt cutter or hacksaw to trim to size. Double-check instructions for proper measurements and alignment. Testing stability after adjustments ensures reliability. Prevent future issues by following manufacturer guidelines and verifying each step before proceeding.
Completing your ClosetMaid wire shelving installation successfully requires careful planning and adherence to instructions. This guide ensures a cleaner, more organized space, maximizing efficiency and satisfaction with proper setup and use of the ClosetMaid system.
Plan your layout, ensuring accurate measurements and optimal use of space. 2. Attach wall clips and support brackets securely to the wall. 3. Install shelving units by aligning and locking them into place. 4. Assemble and mount closet rods for hanging items. 5. Make final adjustments to ensure stability and alignment. 6. Trim any excess materials for a polished finish. Following these steps guarantees a successful ClosetMaid wire shelving installation.
Maintaining Your ClosetMaid Shelving System
Regular maintenance ensures your ClosetMaid wire shelving remains durable and functional. Dust shelves periodically with a soft cloth and wipe down with a damp cloth for cleanliness. Inspect for damage or wear, tightening any loose connections. Avoid overloading shelves beyond their weight capacity to prevent sagging. Clean up spills immediately to prevent stains or rust. Schedule annual checks to ensure stability and reorganize items as needed for optimal space utilization.
Additional Resources and Support
For further assistance, visit the ClosetMaid official website for detailed installation manuals, video tutorials, and customer support. Explore troubleshooting guides and FAQs to address common issues effectively.
Accessing the ClosetMaid Installation Manual
The ClosetMaid installation manual is readily available on their official website. It provides detailed, step-by-step instructions for wire shelving installation, including tool lists, safety tips, and troubleshooting guides. Users can download the PDF manual directly, ensuring they have all the necessary information to complete the installation successfully. Additionally, the manual covers various configurations and customization options, making it an essential resource for both beginners and experienced installers.
Where to Find Additional Help and Tutorials
Beyond the manual, ClosetMaid offers additional resources on their website, including video tutorials and FAQs. Home improvement forums and YouTube channels also provide hands-on guidance. Retailers like Home Depot and Lowe’s often host workshops or offer expert advice. For complex installations, professional installers can be hired through ClosetMaid’s partner network. These resources ensure that users can overcome any challenges and achieve a perfect setup for their wire shelving system.